Photoshop
PHOTO MANIPULATION

Here's the tutorial that i've followed, may you also learn from this..
1. The stock picture my photo manip will be based on is the one below. (paste this onto a new canvas and call it face)

2. Ok, lets do some work on her face, grab the clone stamp tool (s) and get a soft brush. Now, you want to hold ALT and click on her cheek on ---> that side of her face. then drag about on the eye just above. Keep repeating this process to blend over her eye.

3. Next, grab the burn tool and start work on her opposite eye with the shadows range selected on a soft brush. The exposure can go to around 30% - don't worry if it looks a bit shabby, we will add more effects later to hide some of the harsh work.

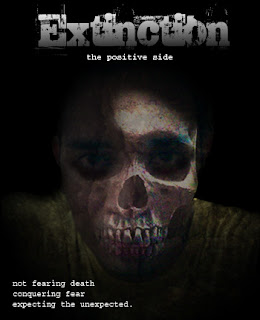
4. Next, paste the following stock skull on top of the 'face' layer, and call this layer 'skull'

5. Right - Add a new layer mask to the skull layer, desaturate it a bit (image > adjustments > hue/saturation) then rotate it a little clockwise. Now, using a soft brush, about size 70 and your foreground set to black - hide the part of the layer you don't want (which is everything except the mouth)

6. Paste the following image above the skull layer... Now, set the blending options to soft light (on the layers palate) but leave the opacity on 100% This is just to added a grungy cutten texture... can can always delete any misfit parts with the eraser if need-by

7. Ahhh.... that's nice, lets add another texture also! just to make sure we have the effect we are looking for... soft light - opacity = 26%

8. Its looking good!! Finally, we can just add a few stitches with the paint brush tool. Frame it and what not, maybe put your name on. I did however desaturate the whole image by a little bit...

src: StealthDesignz


0 Comments:
Post a Comment
Subscribe to Post Comments [Atom]
<< Home